wizard pat you on the back.avi (Approx. 2Mb)

wizard congratulations.avi (Approx. 2.2Mb)

wizard welcome.avi (Approx. 1.2Mb)

wizard wrong.avi (Approx. 0.8Mb)

wizard thank you.avi (Approx. 0.9Mb)
This article covers a quick run through of the process taken to produce a collection of short dialogue animation clips for Icanect and their online web wizard for creating custom web page templates. Thanks must go to Bob Hurwitz for allowing these sequences to be used publicly. Take a look at the below avi files (approx 5hrs work per movie, files are Mac and Windows compatible). I don't pretend to be a god like being of the animation world but if you want to know a little more as to how they were done, read on...

wizard pat you on the back.avi (Approx. 2Mb)

wizard congratulations.avi (Approx. 2.2Mb)

wizard welcome.avi (Approx. 1.2Mb)

wizard wrong.avi (Approx. 0.8Mb)

wizard thank you.avi (Approx. 0.9Mb)
The mouth rig uses a pose layering technique for greater control using pose sliders, driving individual muscle groups rather than a complete phoneme target. These muscle group rigs initially make it more difficult to define the phoneme shapes, but once done, they provide more flexibility during the animation process, especially when layering a more expressive character performance together.
Eight pose sliders are enough for a basic lip synch: Lip Stretcher, Lip Tightener, Sneering Muscle, Bottom Lip, Tongue, Smiling Muscle, Sad Muscle and Jaw.
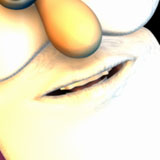

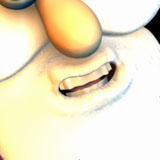
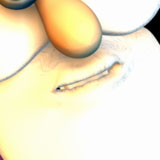


Each of the basic phoneme shapes shown below can be formed by setting just these eight pose sliders. A simple table made from of each of the eight values required for each of the major phoneme shapes can be used as reference during later lip synch key-framing.



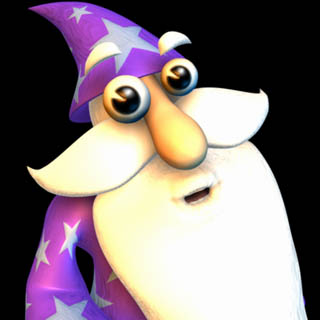


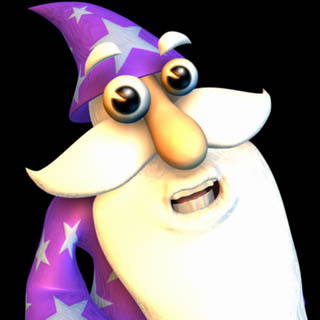

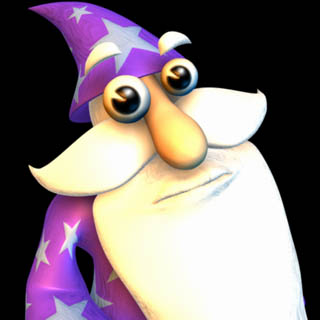

The audio tracks were provided by the team at Icanect, each track was imported and dropped into an Action ready for use. Before starting pose sliding, I recommend opening up the model Pose container (in the Project Workspace) and selecting each of the poses in turn, checking or un-checking "Display slider on Pose Sliders window" property - you only need to have the mouth sliders displayed so you can work uncluttered. With an open Action window, holding the dialogue, and the Pose Slider window ready, its time for the tedious bit...
My method of phoneme blocking is to start by setting keys on all of the eight pose slider values at each needed phoneme, stepping through the Action frame by frame, dropping keys where necessary (using the Pose Sliders numerical inputs from the reference phoneme shape value table). For mouth shape holds, I prefer to just drop in extra keys, rather than breaking the work flow by adjusting channel curve magnitudes - do that later ;o). As to which phoneme shapes are needed at each sound, practice makes perfect, it's not a difficult as it may seem at first...
Once the first pass of the dialogue track is complete, it can be rendered out and played in synch to the dialogue sound track for closer analysis. It's a simple process to then open up the eight mouth slider channels and adjust timing and add extra keys where needed. The wizard sequences as shown above took between 40min and 3 hours each to key the basic phoneme shapes and tweak the timing. Shown below is a channel view of the lip synch data for the wizard_wrong.avi.

Ok, Ok... I admit it, I did this the wrong way round!! It's generally agreed that you should animate body movement first and lip synch second. This helps you to focus on making the body communicate what's being said before you start playing with phoneme shapes. Next time, I promise. ;o)
I wont go into too much detail as it would get wordy, but here are some basic tricks I used during body animation:
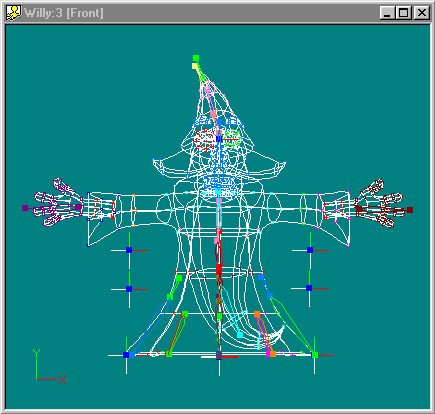
Well that's about the worst of it, glad you read down this far, I at least hope it was of some help. If you haven't seen them yet and want to see more of web wizard Willy there are larger renders on the other web wizard page. Below are a couple of extra screen shots showing the character's simple mesh and bones.
